Mountain photography is arguably more popular and accessible than ever before. With so many people taking photos, how do you make yours stand out? And how do you consistently take great photos, rather than just now and again? Image professional and regular feature contributor James Roddie has some practical tips to help you improve your mountain photography…
James has previously won the Wild Woods category at British Wildlife Photography Awards. So you’re in good hands with these tips on how to improve your mountain photography.
How to choose the best camera for landscape photography
Many smartphones now have cameras capable of producing superb photos. So if you are good at composing an image, there is a lot you can do just with your phone. However, if you want to get serious about landscape photography, you will need a dedicated camera.
They have larger, higher-quality image sensors and can be used with a wide range of lenses – allowing you to take photos that can be viewed larger and at higher definition.
As hillwalkers, we’re always trying to save weight in our backpacks, and for this reason a ‘mirrorless’ camera system is recommended.
These are lightweight cameras, generally small in size, but still capable of producing photographs of the highest quality.
We’ve got a great guide for Choosing the right camera for outdoor photography. In case you wanted a deep dive into the different types of camera.
Camera lenses that will improve your mountain photography
For mountain landscape photography you don’t want to haul a bag full of heavy lenses around, so it is best to limit it to one or preferably two lenses. A good combination is a wide-angle zoom (such as an 18-55mm lens), and a standard zoom (such as a 24-105mm lens).
Wide-angle lenses are used for capturing expansive scenes, usually with close, prominent foregrounds and more distant background interest.
Standard lenses are used for capturing photos from a perspective more normal for the human eye.
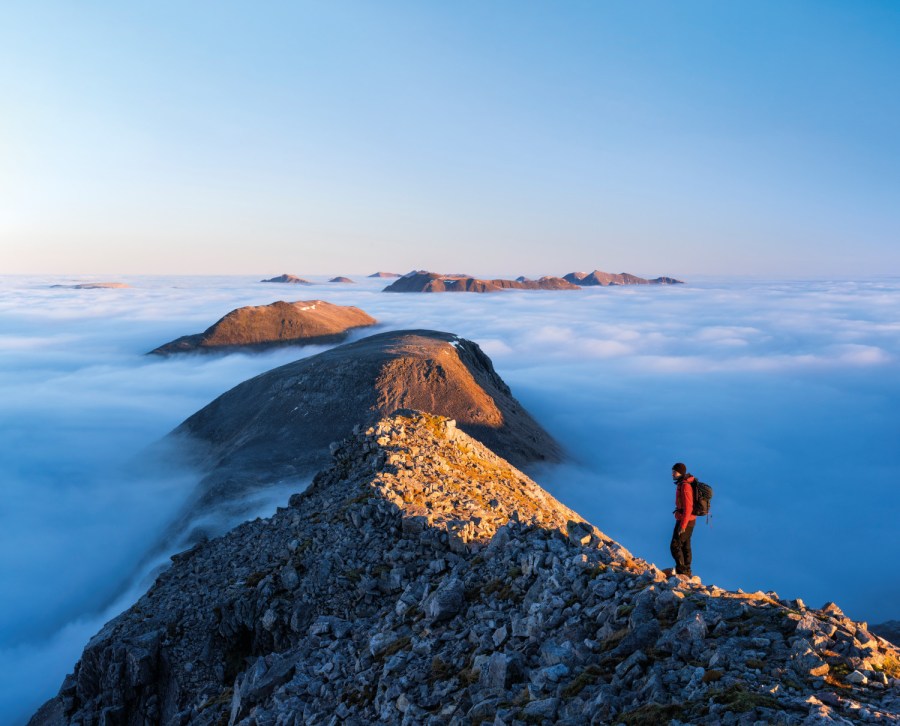
If you want to take things further, then a telephoto lens (such as a 55-300mm) will allow you to pick out more distant details in the landscape, such as a lone mountaineer silhouetted on a summit.
It can also be used to compress perspective, making distant ridges and summits appear more prominent.
A lightweight tripod is also recommended, as it will help you to take sharp photos in low light. The best light of the day is often around sunrise and sunset, when taking pin-sharp photos ‘handheld’ can be very challenging.
Enjoying this article? Then check out Capturing the mountains by night: 6 tips for getting started in astrophotography

What settings should I use for outdoor photography?
Having a degree of manual control over your camera will help you improve your mountain photography. In order to do this, you need to understand exposure. Exposure is the amount of light that reaches your camera sensor.
An over-exposed photo will look too bright and glaring, and an under-exposed photo will be too dark.
A correctly exposed photo will look pleasing to the eye.
Exposure is controlled by three fundamental camera settings:
1. Shutter speed
This is the amount of time that the camera’s shutter is open and light will be exposed on the camera sensor. In low light you will need a long shutter speed, and in bright conditions you will need a fast shutter speed.
Most cameras will allow you to choose any shutter speed from around 30 seconds to 1/4000 sec. Handholding a camera whilst using a slow shutter speed will result in camera blur.
As a general rule: if you are handholding your camera, try to use a shutter speed at least as fast as the value of the focal length you are using.
For example, if you are using a 50mm lens, try to use a shutter speed of 1/50 sec or faster. For longer shutter speeds, as mentioned, a tripod will help ensure your photos are sharp.
2. Aperture
This is an adjustable opening in the camera’s lens through which light travels. Wider aperture will let more light in.
Aperture is measured by f-numbers. Confusingly, the wider the aperture, the smaller the f-number – so f2 would be a wide aperture, whereas f16 would be a narrow aperture.
Aperture also controls depth of field – the zone within your photo that is in focus. Using a wide aperture produces a very narrow depth of field, whilst using a narrow aperture produces a very wide depth of field.
To take landscape photos that are sharp throughout the image, you would normally choose a mid-range to narrow aperture, usually between f8 and f13.
3. ISO
This is the adjustable sensitivity value of your camera sensor. A low ISO value such as 100 will mean the sensor is less sensitive to light, and a high ISO value such as 6400 will mean the sensor is very sensitive.
Using higher ISO values introduces ‘noise’ into your photos, resulting in grainier and less clean-looking photos. So, the lower the ISO value you choose, the higher the image quality will be.
For more mountain and landscape photography tips then check out 6 apps for smartphone landscape photography
Settings that will improve your mountain photography
For landscape photography, using ‘aperture priority’ mode works well in most situations.
Allowing you to choose your aperture and ISO value manually, the camera will then decide on the appropriate shutter speed.
Simply use the exposure compensation dial to make fine adjustments if the photo looks too bright or dark, and the shutter speed will change accordingly.
For most wide-angle landscape photos, an aperture of between f8 and f13, ISO 100, and a shutter speed chosen by the camera are the go-to settings.
This should produce enough depth of field for photos that are sharp throughout, and clean, grain-free images.