If you’re looking to get into scrambling or want to improve your existing skills, look no further. Here, we define the grades, explain how to use your feet and find your way, plus, there’s our recommended routes, gear to take with you and tips on ropework
What is scrambling?
Most hillwalkers with a decent array of days out under their hipbelts will have a good idea of what scrambling’s all about – the experience of moving over terrain that’s steep enough and exposed enough that you find yourself using your hands as well as your feet. But definitions can be as wobbly as a novice on Sharp Edge. While the inclusion of a route in a scrambling guidebook is generally a pretty good indicator that you’re entering scrambling terrain, there are some Grade 1 scrambles that the more confident and competent among us can walk along virtually with their hands in their pockets. Then, at the other end of the spectrum, there are Grade 3 routes that are certainly exposed and challenging enough to be classed as rock climbing.
“I’ve done guided scrambles that have been terrifying in comparison to easy rock climbs,” says Ian Sherrington, Chief Instructor at Glenmore Lodge. “You go to scramble not expecting to need a large rack of equipment and a partner who is very competent in rope work techniques. If you’re unlucky – because the route hasn’t been climbed for a long time or you get it out of condition; or if you stray slightly off-route – you can get into really serious ground very quickly on some of those top-end scrambles, and end up on terrain that feels more serious than on a simple rock climb.”
Of course, it doesn’t actually matter how you label what you’re doing – whether it’s a walk, a scramble or a climb – what matters is that you have an enjoyable and safe day out and are prepared for the terrain and conditions you encounter. Over the next few pages we’ll give you a few tips to point you in the right direction.
Glenmore Lodge mountaineering department offers courses in scrambling, climbing, mountaineering, walking and navigation. For further information visit www.glenmorelodge.org.uk or call 01479 861 256.
Main image: Shutterstock
The grades
- Essentially an exposed walking route that will require you to use your hands in parts. Route-finding is unlikely to be very challenging. Most experienced hillwalkers will not encounter too much difficulty on Grade1 scrambles and they are usually in areas where it is possible to escape onto easier ground if necessary.
- Expect to find yourself using your hands more frequently. Route choice will be more challenging. Many people will prefer to use a rope for protection on Grade 2 scrambles.There are likely to be fewer ledges than on a Grade 1 route and not as many options for escaping onto easier ground. The route might be longer too, and you can also expect to encounter more serious exposure.
- Expect to find yourself using some rock-climbing skills, including the use of rope, placing of protection and belaying. Route-finding may be difficult, the exposure can be fairly daunting and if you do find yourself in difficulty, the only means of retreating may be via an abseil. Often Grade 3 scrambles will also appear in climbing guidebooks, classed as ‘Moderate’ (the easiest climbing grade). You may also find routes graded 3 (S) which refers to particularly serious grade 3 routes, or even Grade 4 (which is used in Brian Evans’ Cicerone guides to scrambling in the Lake District).
Seven tips to help you find your way along a scramble
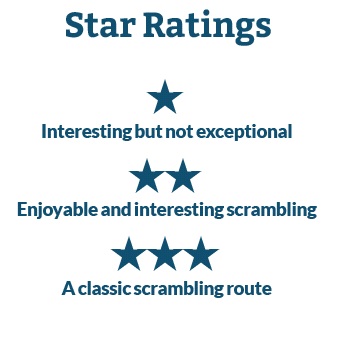
- The lower the grade, the easier route-finding is likely to be. ‘Classic’ three-star routes are also likely to be easier to follow.
- Do a quick search for any initial knowledge –ask at your local climbing shop, go onto the blogs, see if you can find some up-to date information about the route.
- Plan a walk-in that allows you to check out the scramble from the approach.
- Don’t move in on the scramble without taking the time to plan your route from below. Ideally, try to get into a position where you can see all the way to the top and look at the features along the route.
- If you are with someone with more experience, allow them to go first.
- Watch out for clues that the route is well travelled – polished rock, footprints on ledges and areas where it looks like potential anchors have been cleaned-up.
- If you find yourself in a position where you’re not very confident about progress, consider at every step upwards whether you can get back down. If not, go back down while you can.
Your mountain apprenticeship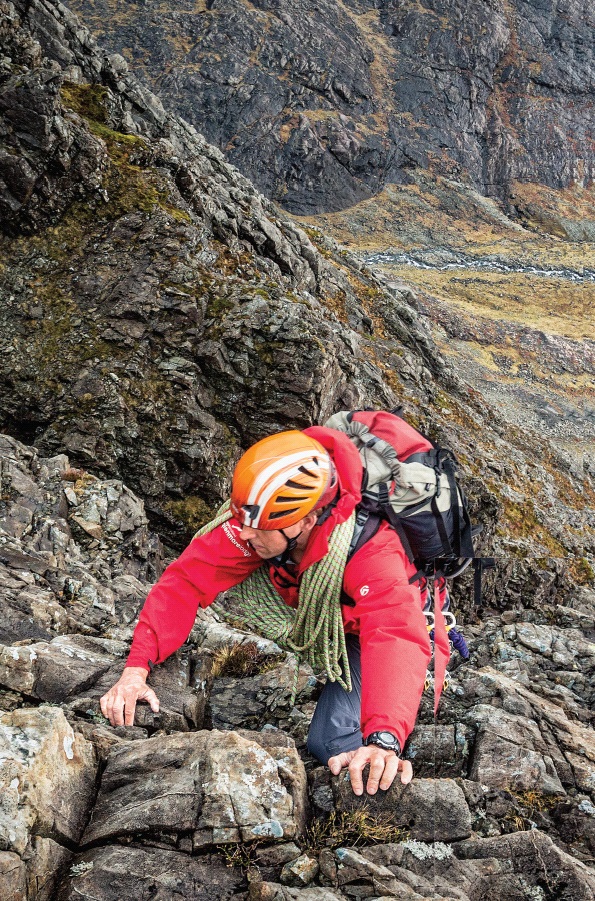
Like any practical activity, scrambling is best learned in a face-to-face environment alongside somebody with more experience. At Glenmore Lodge, Scotland’s National Outdoor Training Centre, Chief Instructor Ian Sherrington recommends that hillwalkers enter into what he calls a ‘mountain apprenticeship’, in order to acquire the relevant skills over a period of time. “Whether you’re going with friends, whether you’re part of a club, whether you take a guide, whether you go on a course, what you’re looking for there somewhere is a kind of trusted mentor that will help you through the experience,” he says. “I think that is by far the best way to learn in an area that requires a lot of judgement.”
Putting yourself through a mountain apprenticeship isn’t just for those who have ambitions to summit the Inaccessible Pinnacle – anyone who wishes to become a more competent hillwalker could benefit from learning scrambling skills from an expert or more experienced friend. Ian suggests that you profile the skills you need to be a good scrambler – if you’re a confident hillwalker then your navigation and movement skills may well be solid, and you’ll probably have a head for heights, but you might need more experience to understand how to interpret scrambling guidebooks and, in particular, to learn the rope-work techniques that are needed to protect yourself and your scrambling partners. Look at where there are gaps in your skill-set and concentrate on developing that area. Then, when you’ve completed your route or are sitting in the pub after your day out with your mentor, talk through what you’ve learned and what you still need to do.
So what else can you do to make the most of the opportunity when scrambling alongside a more experienced mentor? “Err on the side of safety, be cautious, allow time in your day so that you have time to learn during the experience, and have discussions if necessary,” suggests Ian, adding: “Go on days where the conditions are favourable – dry with good visibility and low winds – and maybe go to the place that is generally familiar to you, so you don’t have to navigate in and navigate out. Scrambling in areas that you’re familiar with as a walker will give you a lot of confidence.”
Staying safe
- As a general rule, don’t climb up what you can’t climb down.
- Scrambling routes often follow natural weaknesses which collect loose rock – so watch out.
- Consider wearing a helmet on routes that might funnel falling debris.
- On steeper terrain do not stand below other people; stay to the side until others have passed the obstacle.
- Aim to scramble in favourable weather conditions – when it’s dry, with good visibility and little wind.
- Always be prepared to modify your plans. Having a plan B before you set off will make this easier.
What to wear, what to carry
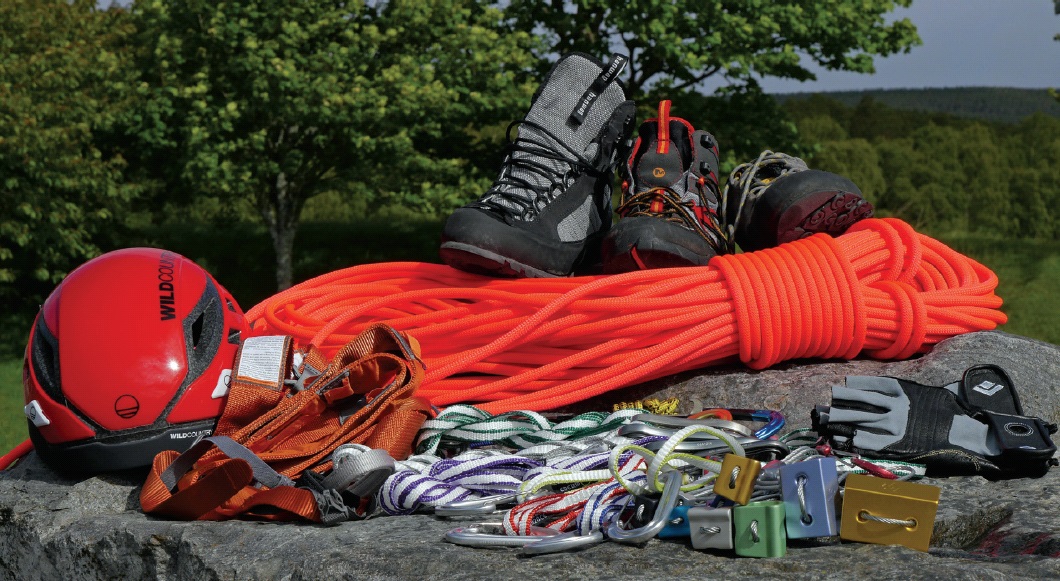
Scrambling will often form the crux of a day’s hillwalking. As such, you’ll want to carry the same kit you would take for any mountain day: waterproofs, extra layers, etc. Consider your choice of footwear, because very flexible soles can provide less security than stiffer boots, particularly on wet rock. If you’re planning a very easy Grade 1 scramble you might not need anything else. But for more technical scrambling, you’ll want to pack a helmet, a rope and protective gear, and perhaps lightweight climbing harnesses. A few examples are pictured here – including nuts, slings and quickdraws . The best way to learn to use this stuff is face-to-face so consider signing up for a course if you don’t have a more experienced friend to show you the ropes (and the harness, and the nuts…).
Glossary
Abseil: To descend using a rope that’s secured above you. In a ‘classic abseil’ the rope is secured around your body; or you could use a dedicated abseil device or belay device to feed the rope through.
Anchor: A rock feature or tree, or a piece of climbing gear placed in a crack in the rock, forming a solid attachment point.
Belaying: Protecting a roped climber by safeguarding their rope, which is often secured to an anchor.
Cam: A spring-loaded protection device.
Hex: A hexagonal nut attached to a wire or tape loop, which is inserted into cracks in rock for protection.
Hold: A natural rock feature that you can place your hands or feet on and use to progress along the scramble.
Karabiner: A metal ring with a spring-loaded gate, used to connect pieces of gear together.
Leader: The person in front on the route, usually the most experienced.
Nut: A metal wedge attached to a loop of wire, which is inserted into cracks in the rock.
Protection: Gear used for arresting falls.
Sling: A loop of strong webbing.
Spike: A large boulder or protrusion of rock, used as an anchor.
Spotting: Standing below another person in order to support them if
they fall.
Thread: The point where two large boulders rest against each other,
used as an anchor when a rope or sling is threaded through the gap.
Heuristic traps
In challenging situations, people often take shortcuts in their decision-making, relying on simple rules of thumb or ‘heuristics’, rather than thinking through the options and consequences thoroughly. This can be a dangerous approach out on the hill. Heuristic traps are often discussed in relation to avalanche safety but here Ian Sherrington from Glenmore Lodge explains how they can also apply in scrambling. The commonly used mnemonic is ‘facets’:
Familiarity
“If it’s pouring with rain, don’t automatically think ‘I’ve done Striding Edge before, let’s go and do that again’. It’ll be very different on a wet day. Just because you’ve done something before, you can’t assume it’s safe. Always think: is it a good time for this particular day out?”
Acceptance
“Acceptance is where someone is suppressing their own concerns and accepting the ‘groupthink’, rather than raising their voice. If you just keep pushing on without good reason to and without good justification, then you could get caught out.”
Commitment
“This is all about having a Plan A and no Plan B. If your plan is to do Striding Edge, what will you do if you get up there and it’s windy, rainy and the group starts to get a bit nervous? If they haven’t considered alternative options at the planning stage then people often just push on.”
Expert Halo
“Overly trusting the ‘expert’ is a potential trap. Whilst belief in your leader is important it’s also healthy that everyone is engaged in the decision making and that means staying alert and asking questions.”
Tracks (or Scarcity)
“The term tracks is taken from the skiing world and is meant to conjure images of skiers racing for off-piste lines not thinking about the avalanche risk. To make good decisions we need to take our time. What we shouldn’t be doing is racing up a route, focusing on trying to overtake other people. That’s not for us in the learning phase at all.”
Social Proof
“The last one is Social Proof – following people blindly. If you are following someone on a scramble and they seem to choose an unsafe or more difficult option, don’t just go the same way because that’s the way they went. Think it through and make your own decisions.”
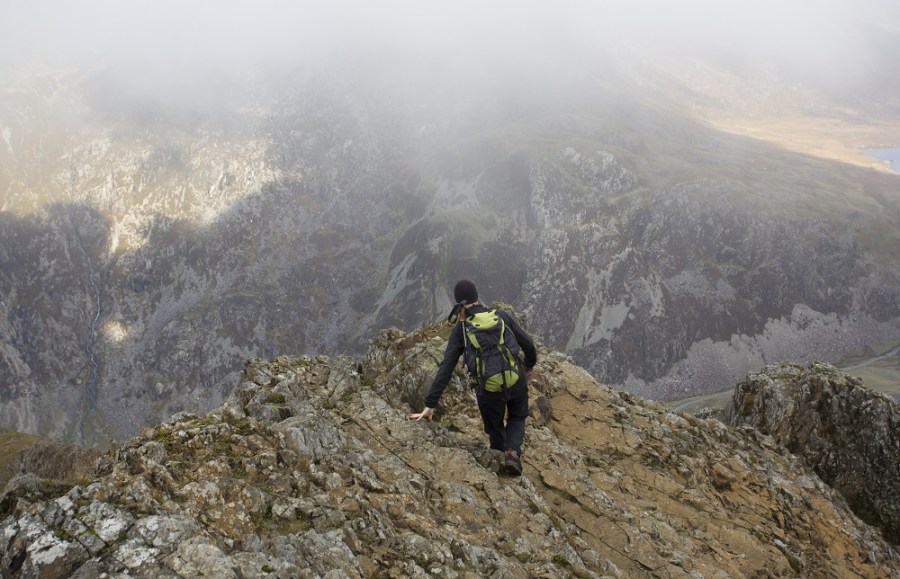
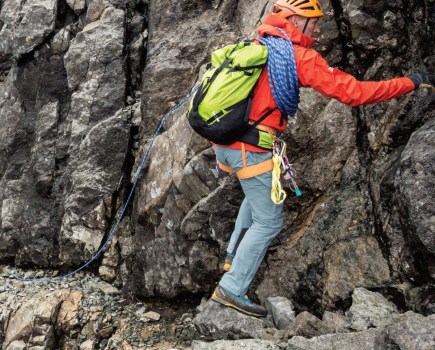
Learn from the climbers
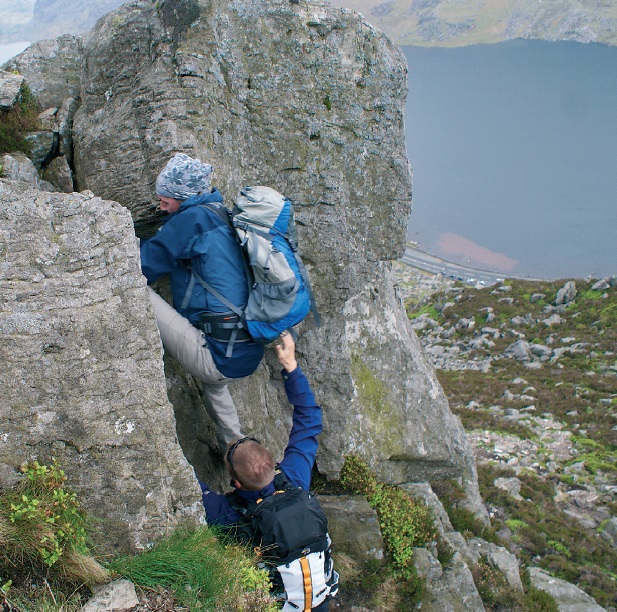
Photo: Ryan Simpson
Higher graded scrambling has much in common with rock climbing, and the two activities often overlap. For that reason, if you want to move into the more challenging end of scrambling, Ian Sherrington at Glenmore Lodge recommends you consider hanging out with climbers for a while. Joining a climbing club or going on a climbing course will give you exposure to the crucial rope-work skills needed to protect a difficult scramble. But it’ll also help you get acquainted with a craggier environment.
“If you’ve come from a hillwalking background, then route-finding on rocky terrain can be a massive challenge,” says Ian. “There are some classic scrambles that make their way through crag-like terrain in incredibly airy places. If you were a hillwalker and found yourself out here with minimum big-crag experience, you could feel lost and afraid very quickly.”
The rope-work skills used in scrambling – choosing anchors, tying knots, using a harness, slings and karabiners – can be daunting to someone with little experience. Again, acquiring a little more information than you might actually need can be a great way of gaining confidence. “Go and be guided on some basic rock climbing and then come back and look at the absolute basics,” suggests Ian. “Every time someone goes off scrambling, they decide on the amount of kit they’re going to take and the style they’re going to climb in – that’s an easy decision for a climber to make; it’s a really hard decision for somebody to make who doesn’t have a lot of rope-work skills.”
Classic scrambles
Grade 1
North Ridge of Tryfan, Snowdonia
Crib Goch, Snowdonia
Sharp Edge & Halls Fell Ridge, Blencathra, Lake District
Jack’s Rake, Pavey Ark, Lake District
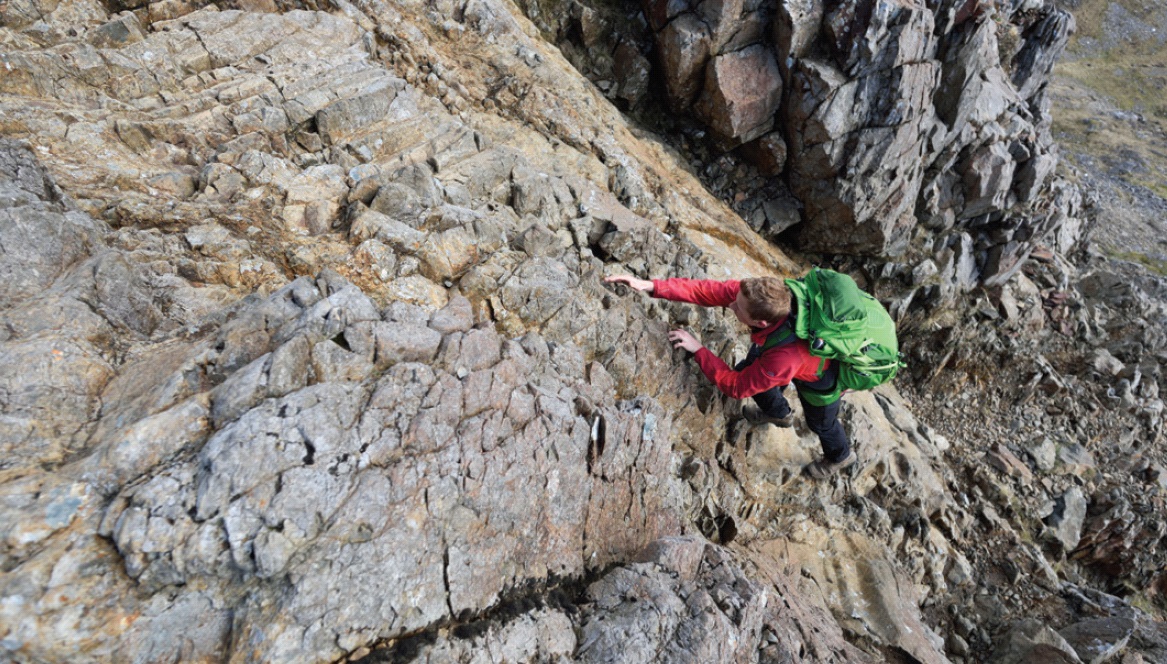
Photo: Ray Wood
Carn Mor Dearg Arête, Ben Nevis
Grade 2
Aonach Eagach, Glen Coe
Liathach’s Am, Fasarinen Pinnacles, Torridon
Wistow Crags, Pillar, Lake District
Eagle’s Nest Gully and Arrowhead Ridge, Great Gable, Lake District
Forcan Ridge, Kintail
Grade 3
Curved Ridge, Buachaille Etive Mor, Glen Coe
Pinnacle Ridge, St Sunday Crag, Lake District
Kinder Downfall, Peak District
Sentries Ridge, Mynydd Mawr, Snowdonia
An Teallach traverse, Great Wilderness