Ian Battersby urges a unicorn to break a winter spell cast on Scargill High Moor, County Durham.
Scargill High Moor lifts over the Greta Valley where Roman invaders dug into bitter endurance at Lavitris. Remains of the fort are now succeeded by more substantial Bowes Castle ruins. These strongholds subjugated the Stainmore Gap route through the Pennines, still exploited by the main A66 crossing today. It’s a vast valley with views reaching to Mickle Fell and the twisting tease of Teesdale. Uncommon hikers are overlooked by sporadic red kites and skeins of greylags arrowing between winter feeding grounds. Most waders will have gone, but shy roe deer may venture from occasional tree cover around dawn or dusk. At first the land seems bland, but crags surge from the heather for those who persevere here. Spanham Scar dominates outward and return views and Elsey Crag climbs to the pinnacle of the route. It also trades the end of decent path for a couple of miles of rough ridge to Tarnhow Hill. Winter winds whistle through the pass, freezing and easing the way between shrinking heather and tussock, delivering a magical spell on calm, sub-zero days, that can be amenably broken while thawing in the Ancient Unicorn Bar, a traditional coaching inn back in Bowes.
Scargill High Moor via the Ancient Unicorn: route description
START/FINISH: The Ancient Unicorn Bar in Bowes; GR: NY995135 | MAPS: OS Explorer OL30 (1:25k), OS Landranger 92 (1:50k) | DISTANCE: 17.0km / 10.6 miles | ASCENT: 382m / 1,253ft | DURATION: 6-7 hours
1. NY995135: Head E down the road from The Ancient Unicorn to the roundabout. Turn R past the village car park and drop S downhill to Gilmonby Bridge over the River Greta. Climb SW through Gilmonby then S to a footpath immediately after Greta Farm on the L. Head SE across a field to a walkers’ gate, climb SSE to a stile, then turn S to join the lane. Turn L heading SE along lane for 500m to a public footpath at a gate on the R after 500m.
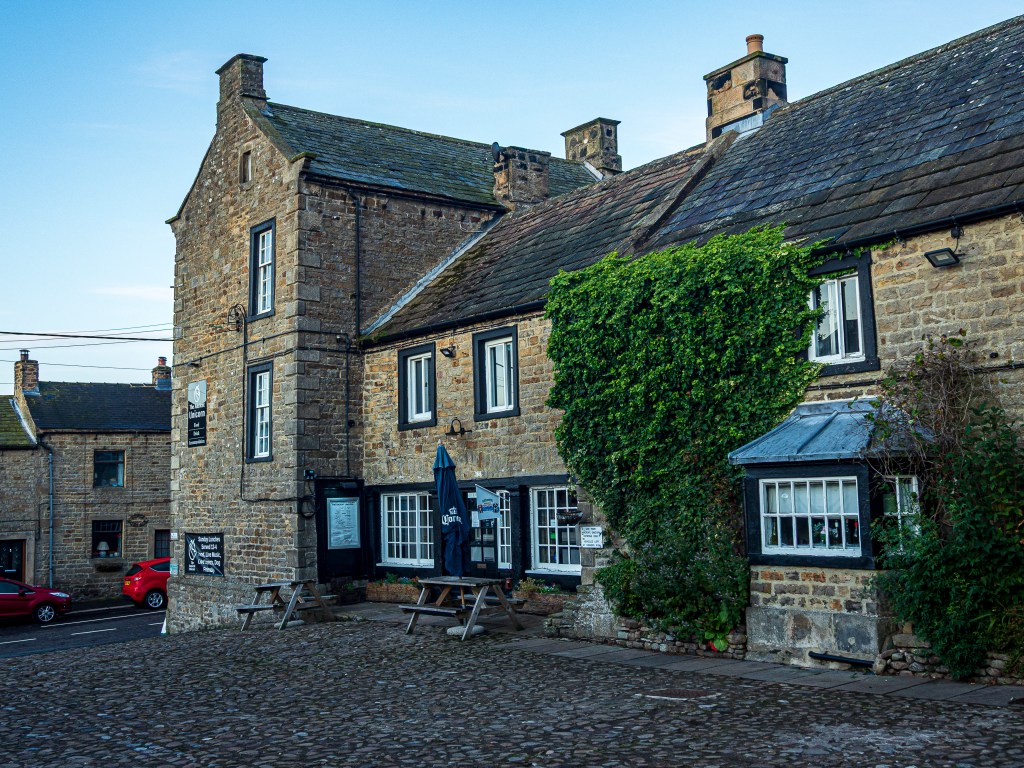
Ancient Unicorn pub in Bowes. Credit: Ian Battersby
2. NZ002124: Go S across the first field to a ladder stile, then SSE to a stile crossing a wall junction. Continue SSE over a stile, then SE, joining a track to Farewell Farm. Go S through the farm, climbing past an isolated barn to open country, with Spanham Scar sweeping up from Scargill Low Moor ahead. The track heads SE across The Combs, fording Eller Beck, and climbing past Spanham West Hill, before dipping to ford Seavy Sike. Head E after the gate, climbing to another gate at Spanham Farm.
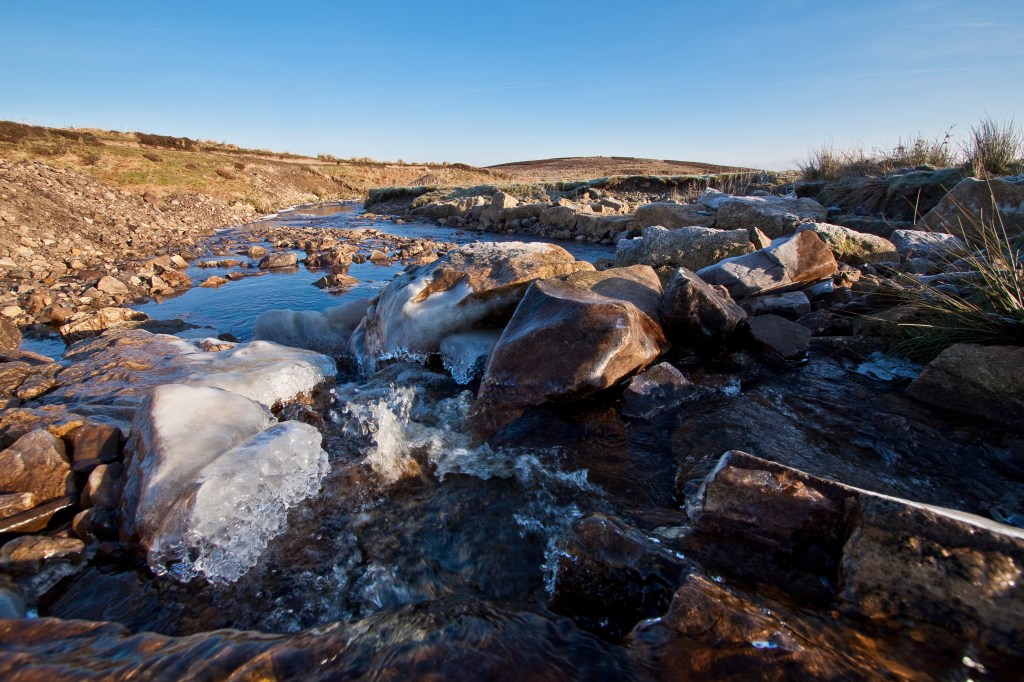
Eller Beck in winter. Credit: Ian Battersby
3. NZ015101: Without entering the farm gate, turn WSW, and climb invisible path by a fence up easy pasture to a gate on the skyline. Continue WSW on green track through the next gate, then wander at will to explore the striking edge of Spanham Scar to the north.
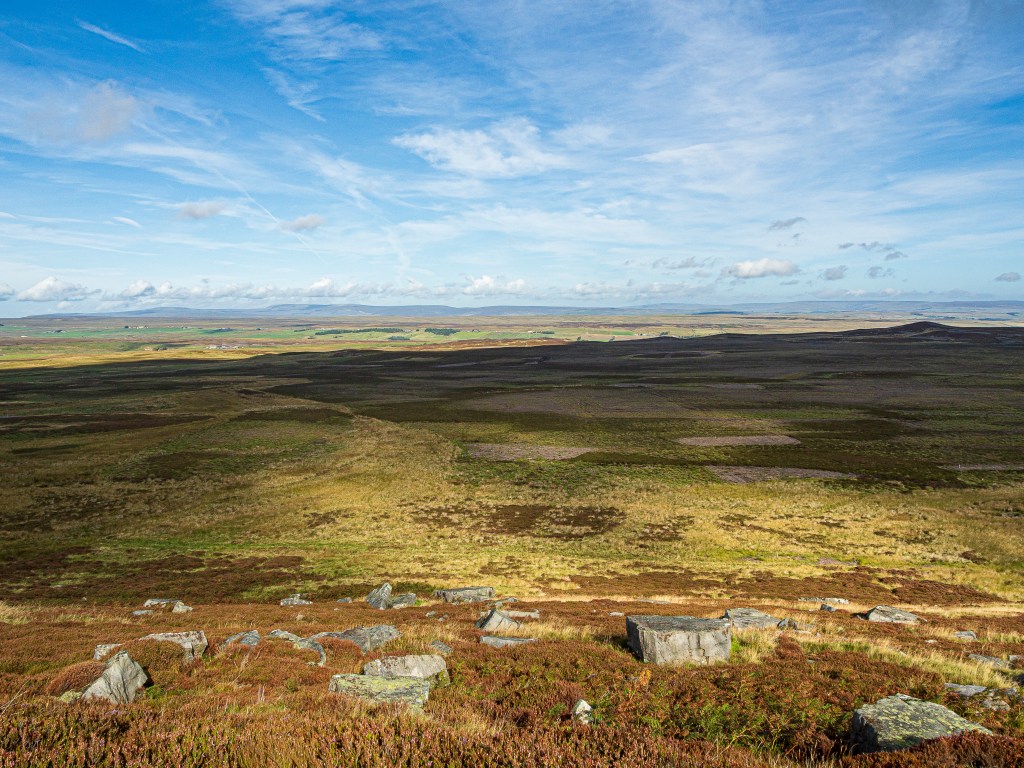
Spanham Scar. Credit: Ian Battersby
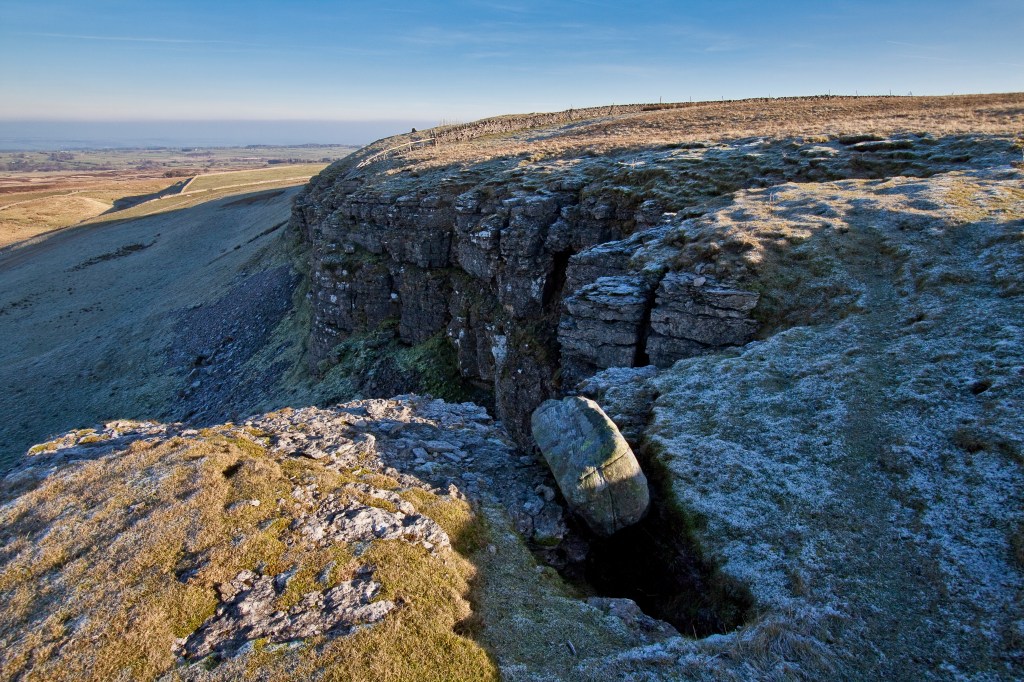
Circle S to re-join the track, which climbs to dog-leg through a gate to a fork junction. Turn R on lesser track, climbing SSW then veering L past remnants of Scargill Mine to reach the plantation fence and follow it SW up to a turning circle at the end of a stony track. Go straight across, climbing SW. Towards the top of Round Hill the mapped path disappears. Aim L, climbing steep heather to a metal walkers’ gate in the wall topping Elsey Crag.
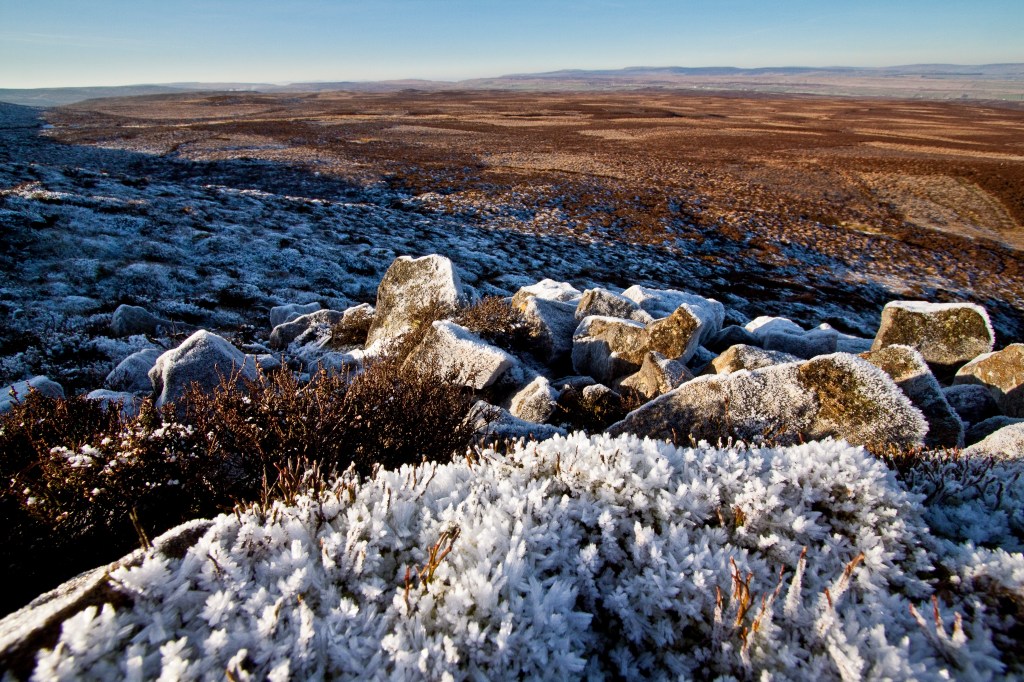
Frosted rocks at Elsey Crag. Credit: Ian Battersby
4. NZ004080: Through the gate head WSW to Frying Pan Stone at the end of the Wall. Follow the low fence WNW, crossing it at a convenient point, and shadow it over Great and Little Foster Hills, and the prominent point at Tarnhow Hill. This is trackless terrain through heather and tussock grass, though flighty vehicle tracks can be combined with heather burn back for ease. Continue dropping from Tarnhow Hill by the wall on track towards the mapped bridleway, which is negligible on the ground. Better to turn R before it on minor path heading NE over Bleakhow Edge, which also delivers better views.
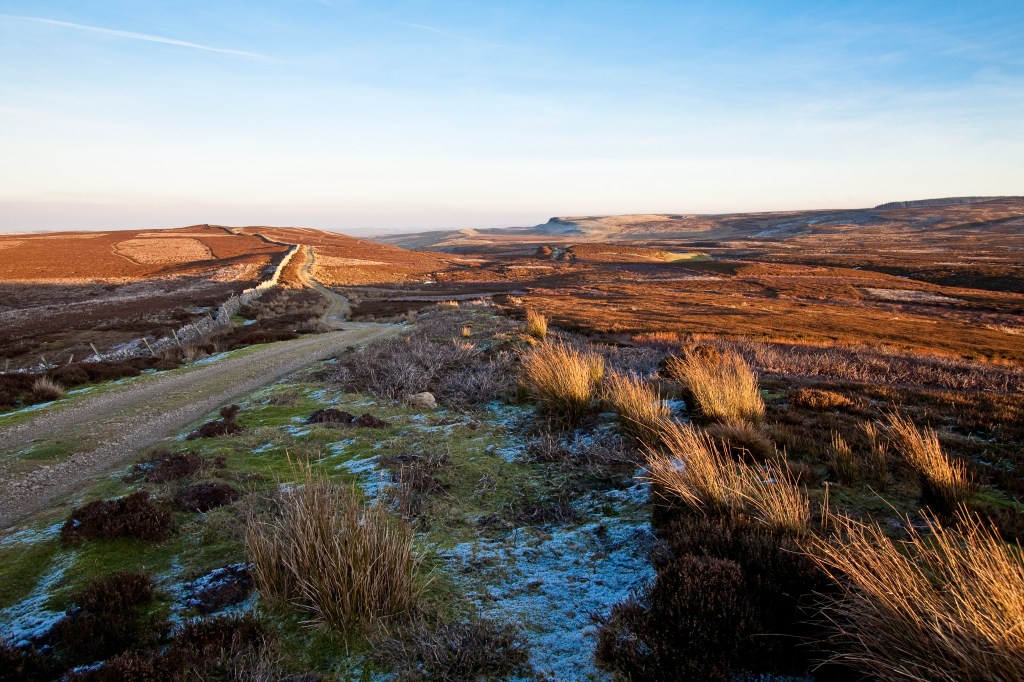
Bleakhow Edge. Credit: Ian Battersby
5. NY978091: Continue NE to a kink in the edge and drop down a spur, then veer N to intercept the vague bridleway, and follow its mapped course NE to a line of grouse butts by an Eller Beck tributary. The bridleway follows the shooting track N to bridge the beck twice. Ignore the non-existent mapped bridleway which veers R. Instead keep to the main track climbing N to a Track T-junction at Hazel Bush Hill ahead.
Eller Beck Rigg at sunset. Credit: Ian Battersby
6. NY986103: Follow this bridleway ENE along Eller Beck Rigg for 1km to a gate just after a ladder stile. Through the gate the bridleway gets lost in heather. Continue N dropping to a wall in front of scots pines. Follow the wall NW, crossing a stream where it burrows into the ground, and climb to a gate. Through the gate head N alongside a fence and wall crossing two fields, with Bowes Castle standing out ahead, to reach the lane. Follow the lane NE to Gilmonsby and retrace the route to return.
Further information
PUBLIC TRANSPORT: None convenient
TOURIST INFORMATION: Barnard Castle, 01833 631107 (www.thisisdurham.com)