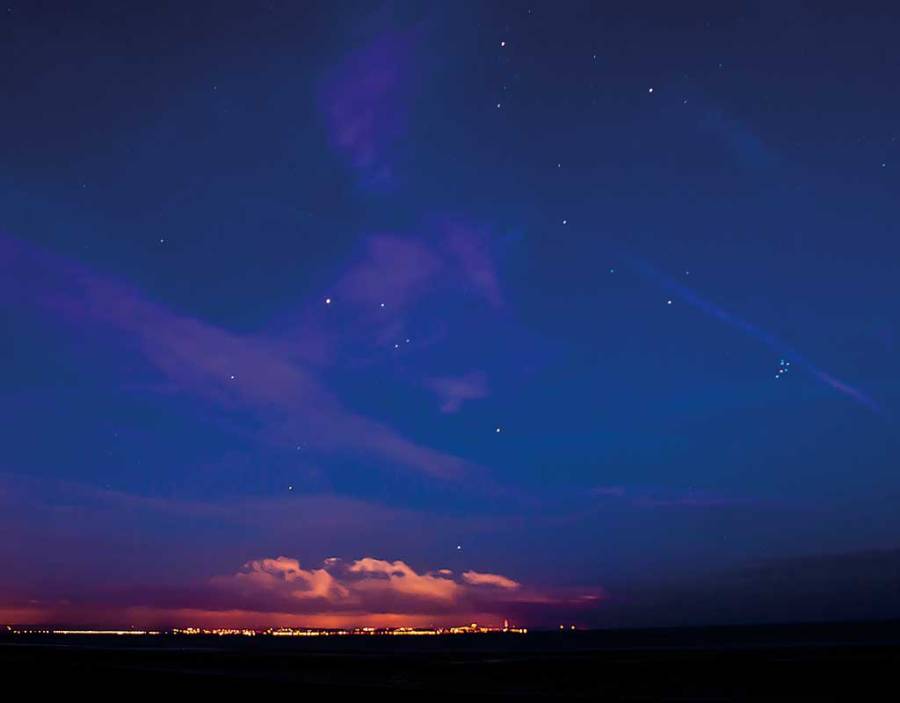
A winter wild camp can provide excellent conditions for photographing the night sky. Geoff Barton offers some tips for getting started…
Taking photographs of the night sky becomes much easier in winter. Summer’s great – particularly for shooting the Milky Way – but really dark skies can only be found at unsociable hours. Winter allows you to get out and shoot the stars at a more civilised time of the evening!
Where and when
Getting away from towns and cities is essential for really good shots – the darker the better. A bright, full moon will obscure light from the stars.
Equipment
A tripod is essential, as sturdy a model as possible – any camera shake will ruin your picture. Also useful is a remote shutter release. If you’re not using one of these, set the camera’s self timer to two seconds; the delay in shooting will negate the shake caused from pressing the shutter release.
Settings
Firstly, auto-focus won’t work, so set to manual and focus on the furthest object you can see. If it’s too dark, turn the dial to infinity, then pull it back a tiny amount. Take a test shot to review the sharpness. Choice of lens is important: a
wide-angle lens (or wide-angle setting on a zoom lens) works well for capturing a broad sky vista. Next, set the aperture as wide as possible – the lowest f-number. Your ISO setting will depend on your camera and personal preference. For older cameras, it’s best to keep the ISO low to avoid too much noise. Newer DSLRs have fantastic noise performance at high ISO values that were impossible a few years ago. If you’re getting a lot of noise, reduce the ISO and lengthen the shutter speed to compensate. If it’s still a problem, experiment with the noise reduction tools in your editing software. If you shoot in RAW format (I always do) then Photoshop can do a great job of removing unwanted noise. Likewise, RAW format allows you to correct the white‑balance after shooting. If you’re shooting in auto white-balance and find that the skies look too warm, try switching to Tungsten white-balance.
Lastly, you need to set the shutter speed, which will be used to control the exposure. Beyond 25 seconds you may start to get ‘star trails’ (see below), so start with 20 seconds and go from there. You can always adjust the ISO or aperture to control the exposure if necessary.
Star trails
This is when a shot is exposed for a very long time (anything from a few minutes to a couple of hours) in order to track the motion of the stars across the sky. The stars then appear as lines in the picture, curving in the direction of their movement. A remote shutter release is essential, along with very dark conditions, and a lot of patience!