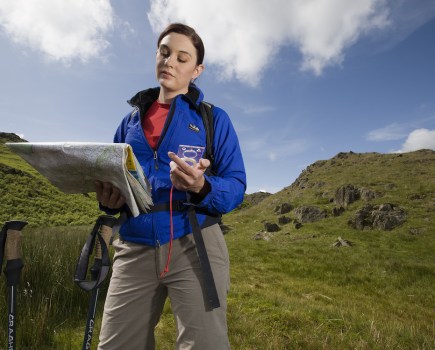
Advanced navigation instructor Lyle Brotherton demonstrates the best techniques for navigating in bad weather
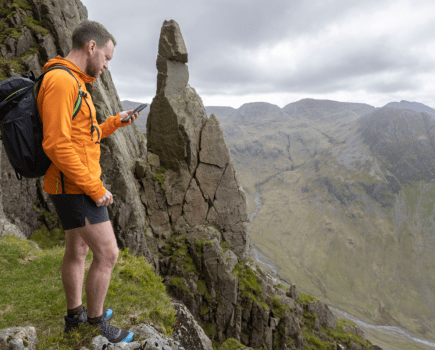
Last month we featured exactly what to do in a specific weather feature of winter, whiteouts. This month we are going to look at bad weather in general and the steps you can take to navigate if you are caught in it. One of the striking features of British weather, as opposed to weather in the USA, is that as a relatively small island, our weather changes both frequently and rapidly, and at no time more so than in winter. The RussiansNa say that there is no such thing as bad weather, only bad clothing! So having the right clothing is our first consideration, beyond this, the main feature of bad weather is reduced visibility.
First response when the weather changes
- Stop immediately.
- Take a compass bearing on your Attack Point or, if this is no longer visible, any other feature you would be confident is on your map.
- Get everybody together.
- Ask people to think what they have just seen while walking and add this information to your own recollection – discuss it.
- Relate this and your bearing, to your attack point and features on the map to get a fix.
Bad weather navigation techniques
Back markers
If alone, use a stick as the back marker or if with another person, use them (they do not need to be a navigator).
1. Select the bearing you are going to walk on. Ask the second person (your back marker) to stand still and agree your signalling.
2. Walk this bearing to within a safe limit of visibility. Stop, turn around and take a bearing on your back marker. Move sideways to correct your position if necessary.
3. Put both arms up in the air to indicate to the back marker they must now walk to you (pictured below).
4. The back marker also puts both arms in the air to acknowledge, then walks towards you. Repeat the technique as required.
Steering
This requires two navigators: one follows behind as a back marker and corrects ‘drift’.
1. Select the bearing you are going to walk on and both set your compasses to this bearing
2. The first person, who should be the most accomplished navigator, leads off on this bearing and walks to within a safe limit of visibility, stops and turns around.
3. The second person takes a bearing on the lead person. If the leg has been correctly followed the rear person puts an arm up vertically.
4. If the course needs correcting the rear person points which direction the lead navigator must move using their right or left arm outstretched.
5. When the lead navigator is in the correct position the rear person again raises their arms. The lead navigator confirms acknowledgement by raising both arms vertically, upon which the rear person walks to the first. Repeat the technique as required.
Measuring distance using pacing
This is one of the most valuable techniques for all-weather conditions,
and comes into its own in poor visibility, either due to bad weather or at night time. We can determine how many paces it takes for you to walk 100 metres, this is called your Pacing Count, or your PC. This known number of steps can be used to determine how far you have travelled. This system of navigation is called ‘dead reckoning’ and is one of the most important techniques you will learn.
Determining your PC
Select a level piece of ground, a football pitch is ideal. Use your map tomeasure 100m or better still, measure it out with your distance lanyard.
1. From your starting line walk at your normal pace and count your double step – if you start by putting your left leg forward first, count every step thereafter of your right foot only – this is a double step and counts as one pace.
2. Stop at the end of the distance and record this number.
3. Repeat this, as you need to relax into your stride, and make sure that you are both counting and pacing consistently. This number of paces is your personal PC (typically this varies from 55 for very tall people, to 75 for people with shorter legs). You now know your personal PC.
How to calculate distance
For less than 100 metres
Now you know your own PC on this terrain, you can predict how many paces you will need to cover say 50m (PC divided by 2) or 25 m (PC divided by 4).
For more than 100 metres
When travelling further than 100 metres it is easy to lose count so the technique employed is to count 100m then, without stopping, start recounting your paces from one. Record each 100m travelled by putting a pebble in your pocket or on a tally counter.
The following factors increase your pace count – you must allow for them by making adjustments.
- Slopes Moving up a slope
- Winds In a headwind
- Terrain Crossing sand, gravel, mud, snow or heavy undergrowth
- Elements Falling snow, rain, or ice
- Apparel Excess clothing, a heavy rucksack and boots with poor traction
- Visibility Poor visibility either in bad weather or at night
- Alertness Mental and physical exhaustion
Three-person line check
You need a minimum of three people for this technique, two of whom must be navigators.
1. Select the bearing you are going to walk on and set your compasses to this bearing.
2. The first person, who should be the most accomplished navigator, leads off on this bearing
3. The second person, who need not be a navigator, follows in the footsteps of the leader, walking 10-15 metres behind (if visible).
4. The third person, who is a navigator, follows using their compass to check the bearing, looking ahead at the two walkers to see if they are in line with each other.
5. The leader needs to stop at regular distances, at which point the rest of the group should stop immediately.
6. If the leg has been correctly followed, the rear person puts an arm up vertically. If the course needs correcting, the rear person indicates which direction the lead navigator must move, using their right or left arm outstretched.
7. When the lead navigator is in the correct position, the rear person again raises their arms. The lead navigator confirms acknowledgement by raising both arms up, upon which the group start walking again.Repeat the technique as required.
10 golden rules for navigation in bad weather
1. Decide if you really need to move or can safely shelter until it passes.
2. Use shorter legs: every step is critical and this allows you to continually review your progress and be able to choose small features.
3. Use back markers.
4. Aiming off is often safer than trying to find a single feature from a distance.
5. Anticipate what you are going to pass and use ‘Collecting Features’ – obvious features in the terrain.
6. Identify ‘Catching Features’ to stop you in safety – obvious features in the terrain beyond your attack point.
7. Make use of outriggers to determine contour slopes. This is where two people walk alongside you and near enough to be seen by you, so you can gauge their height in relation to yourself – this will give you an appreciation of slope aspect and gradient.
8. Use ‘Steering’ or a three-person line check.
9. Keep the group together at a steady pace.
10. Concentrate and lead with calmness.