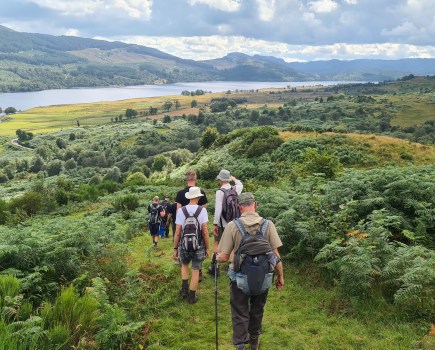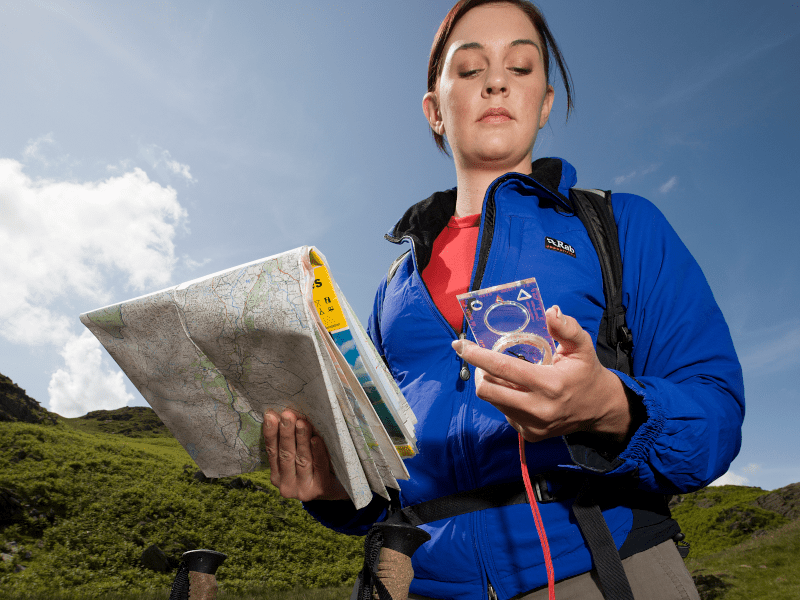
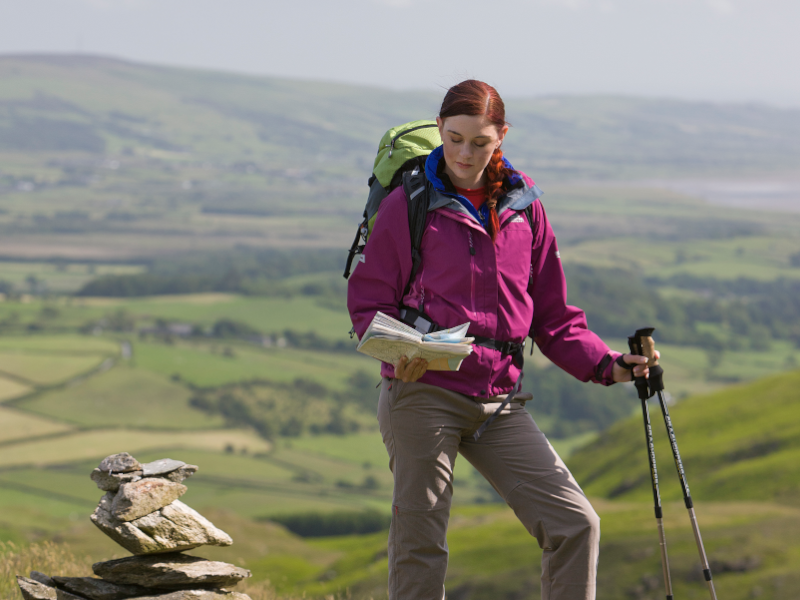
Confused by how to read a map? Backpacker Alex Roddie and Plas y Brenin senior instructor Helen Teasdale help us navigate the basics of map-reading.
Learning how to read a map like those produced by Ordnance Survey and Harvey, is your passport to freedom in the hills. But all those tightly packed lines and cryptic symbols can appear daunting. The good news is that map-reading is not difficult to learn – and, once mastered, it can take you anywhere, here’s how to read a map…
Why learning how to read a map is essential
In our everyday lives, we navigate from town to town with general-purpose maps that often portray the spaces in between as green emptiness. With the growing use of Google maps some people have never had the need to learn how to read a map. However on top of a hill, google will be useless!
“A topo map gives you a good overview of the whole area, making it easier to plan your day,” Helen says. “Detail is key. A topo map will show the relief of the ground, giving you height and shape information, and a much better overview of where the ridges and valleys are.”
A topo map gives you all the information necessary to both plan and navigate a route in the hills:
• Contours: lines connecting points of the same elevation above sea level. Once you learn how to interpret them, contours can help you to visualise terrain in 3D.
• Features: roads, paths, rights of way, streams, walls, cliffs, scree slopes, woods, lakes and more.
“I would definitely recommend going on a navigation course,” Helen says. “Reading a map is quite an art, and being able to relate what you see to the ground is critical. Tuition will make a massive difference.”
How to choose a map
Ordnance Survey (OS) publishes a range of UK mapping; the ones to look for are Explorer 1:25,000 maps and Landranger 1:50,000 maps.
Explorer maps are twice as detailed and show half the area – great for complex regions. Landranger maps lack some features such as field boundaries and walls, but give a broader view.
This can be better for vast, open landscapes such as the Cairngorms. Each sheet covers a specific area; make sure you pick up the right sheet for your walk.
In many areas, Harvey offers alternative maps made specifically for walkers, with less extraneous information than Ordnance Survey, and added helpful features like colour-shaded ground and clearer contours.
“I like Harvey maps because they are a little more pictorial and the contours are often higher-contrast,” Helen tells us.
“Harvey’s 1:40,000 British Mountain Maps are really good, giving you a slightly bigger area than 1:25,000 and removing superfluous details. The Lakes 1:40,000 sheet includes all of the main hills; you’d need four Explorer sheets to cover the same area.”
A map also needs to be weatherproof! Some are printed on waterproof paper; but if yours isn’t, invest in a clear plastic map case.
What are contours on a map?
Depending on the map, contours may be 5m, 10m or 15m apart, and marked by pale orange or pink lines. Some have elevation listed. “As a mountain navigator my first priority is always the contours,” Helen says. “If I look at the ground first and then relate that back to the map, rather than the other way around, it helps me to avoid making mistakes.
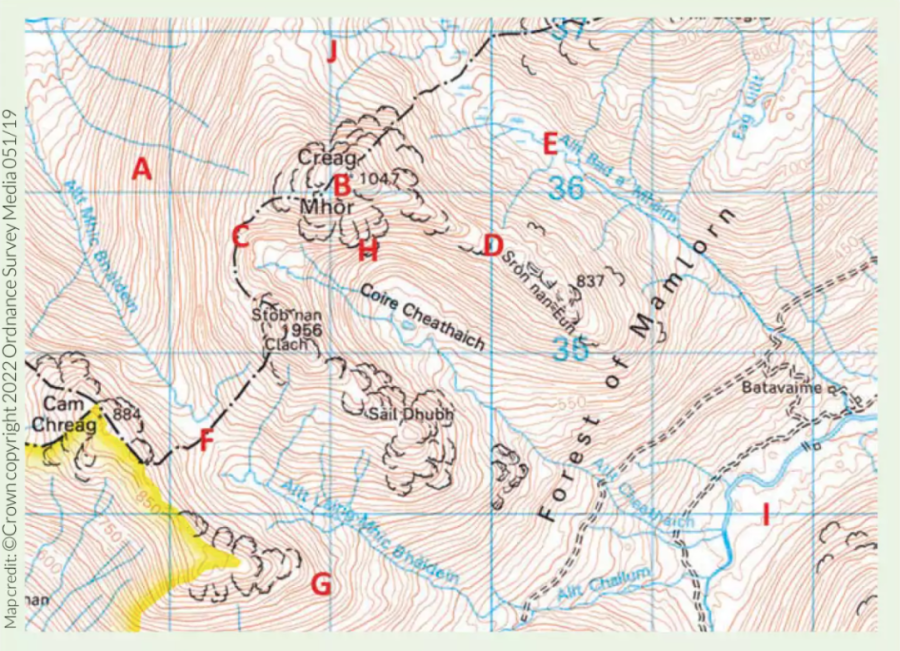
- Slope (A, J) Contours in parallel; the closer the contours are together, the steeper the slope.
- Summit (B) Concentric contours with higher elevations towards the middle lead to a point, often with a marked elevation.
- Ridge (D, G) Represented by U- or V-shaped contour lines, with lower elevations at the closed end.
- Valley (E, I) Can look similar to a ridge, but with higher elevations at the closed end and often a stream in the bottom.
- Col (C, F) A notch or saddle marked by an hourglass-shaped constriction in a ridge’s contours.
- Cliff (H) Very steep, bunched-up contours with rock features marked. Best avoided!
Features to look out for on a map
“The features walkers need to be able to identify depend on the terrain,” Helen says. “If you’re following paths then paths are pretty important! The other thing you may not realise is that rights of way will be highlighted in green, but won’t necessarily correspond to a path unless it’s also marked as a black dashed line.”
Features such as woods, streams and even paths can change, leading to map inaccuracies. “Contours are a constant,” Helen says. “Using features in conjunction with contours is key. If the contours don’t fit the feature then the feature is not correct on your map.”
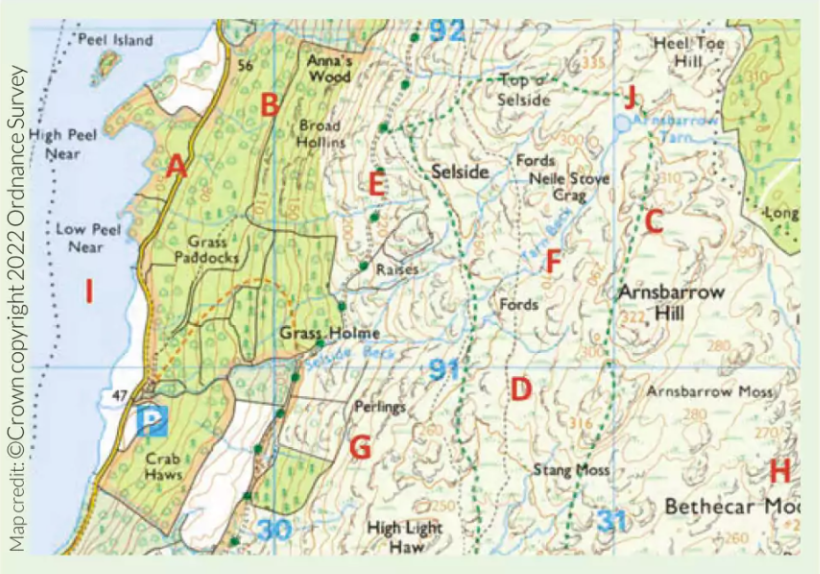
- Road (A) Thicker yellow, orange or pink lines.
- Woodland (B) Green-shaded areas.
- Right of way (C) Green dashed line on 1:25,000 maps, or purple on 1:50,000 maps.
- Footpath (D) Dashed thin black line. May not be a right of way.
- Public track (E) Spaced green spots.
- Stream (F) Blue line.
- Wall or fence (G) Solid thin black line.
- Access land (H) In England and Wales, marked by orange-shaded terrain, denoting open access.
- Tarn or lake (I, J) Enclosed blue area.
How to use a compass
Learning how to use a compass and take bearings doesn’t have to be a ‘dark art’, as backpacker Alex Roddie and Plas y Brenin instructor Cath Wilson explain…
Once you have learned the ins and outs of how to read a map, what’s next in your journey to master the basics of mountain navigation? A map lacks a small but critical detail: orientation. Pointing the map the right way (therefore telling you which way you need to go) isn’t too hard when the weather’s clear, but what about in cloud or heavy rain?
Why you need a compass for hiking
A compass gives you the ability to orient the map, lining it up with north – and hence terrain – no matter the weather. In decent conditions and given a route following a
path or between obvious terrain features, being able to orient the map may be all you need for navigation.
Using a compass also enables you to take a bearing. This is key if visibility is poor, providing accurate guidance from one position to another. A bearing can be taken either from the map or directly on a visible landmark such as a summit.
“A compass is a navigation tool, just like a map, GPS or your smartphone,” Cath says. “A phone or GPS can run out of battery or lose signal, and a compass can break. It’s all about having tools in your toolbox.”
A baseplate compass is the most flexible. “The Silva Expedition 4 is a very popular choice,” Cath says. “It has a longer baseplate, a romer scale and a magnifier, all helping you to take a bearing accurately and follow it. A romer scale is useful for measuring distances on the map or plotting grid references.”
Suunto is another popular brand for mountain use. Avoid any basic compass without a rotating bezel marked in degrees.
Know your compass
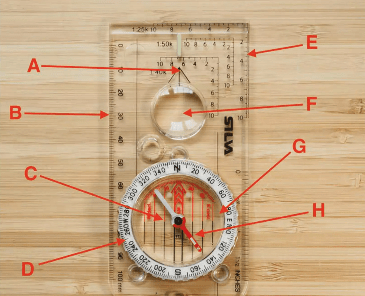
Compass pictured: Silva Expedition 4
- A: Direction-of-travel arrow Marked by a glow-in-the-dark strip. Points towards your destination.
- B: Baseplate Transparent, to allow you to see the map through it.
- C: Orienting lines Used for lining up the capsule with north grid lines on the map.
- D: Bezel Marked in degrees and cardinal points (N, S, E, W).
- E: Romer Used for plotting grid references and measuring distance in hundreds of metres. Several different scales supplied.
- F: Magnifier For magnifying small map features.
- G: Capsule Can be turned through 360°, and is filled with oil to allow the needle to float freely.
- H: Needle Red points to magnetic north.
Taking a bearing from the map
“It’s best to take a bearing before you think you’ll need it,” Cath tells us, “for example, if visibility is getting worse – or if you start to feel unsure of your direction.” Taking a bearing is simple, but it does require good technique.
“Get used to estimating the bearing before you take it,” Cath says. “This helps to avoid making a 180° error. Also, practise when you don’t need it – when conditions are good, or even at home.”
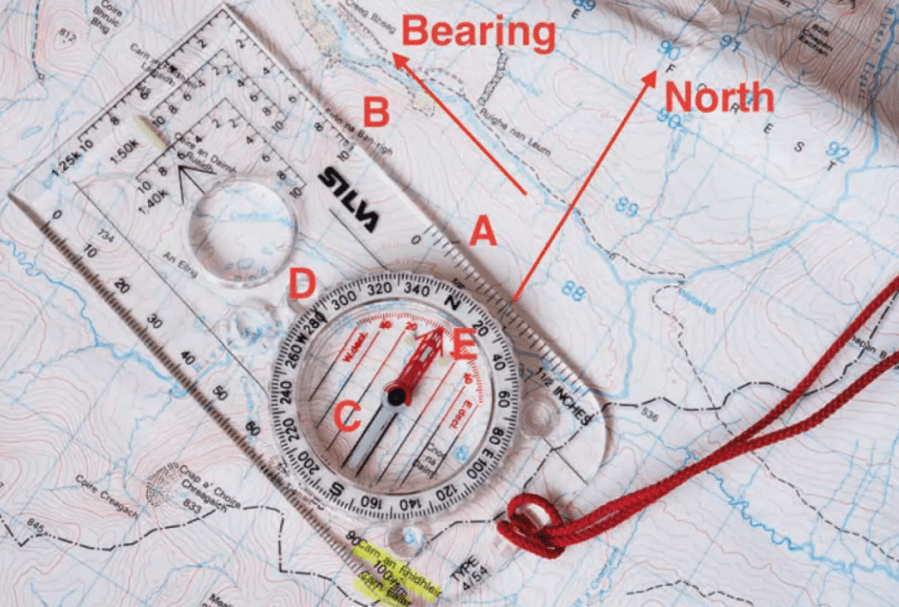
- A: Your location
- B: Destination or waypoint Summit of Sron na Ban-righ. Line up the compass baseplate between your location and destination.
- C: Line up orienting lines Rotate bezel until the capsule’s orienting lines are parallel with the map’s north grid lines.
- D: Read bearing on bezel In this example it’s 286°. Don’t rotate the bezel again until you want to take a new bearing.
- E: Orient yourself Turn around until the north needle matches the north arrow in the capsule. The compass now points towards your destination.
Walking on a bearing
Don’t try to walk directly on the bearing with your compass held out in front of you for too long. It’s easy for small errors to creep in, leading to you going off course
over time.
Instead, sight ahead on the bearing and look for a landscape feature – a rock, tuft of grass – and aim for that, then repeat, checking your compass every few paces. Keep the needle pointing to north in the capsule.
“If you have to walk on a bearing in low visibility, hold the compass out flat in front of you, keeping the string in line with the zip on your jacket,” Cath suggests. “Have a locked-in, centred position with your arm and hand. Move your whole body, not your hand.”
A compass can be affected by anything magnetic in your gear. “Zips, poppers on jackets, torches and mobile phones can all affect accuracy,” Cath says. “Keep your compass away from metal objects.”
Declination
Magnetic north isn’t exactly the same as grid north, and the difference is known as declination. To account for this, you can add or subtract degrees whilst taking your bearing. “Your map sheet will show the declination at the time it was printed,” Cath tells us, “but at the moment it’s so small that we rarely need to account for it.”